Hello,
These are instructions to upload HTML sales pages, Thank you and Download Pages for the eBooks and Squeeze Pages for reports that are provided in my PLR packs. While this may seem intimidating, especially when you are not accustomed to working with code or uploading files to your server, the process is relatively easy, once you do it a couple of times, you will be a pro. If you need help with any of the steps please contact me here.
These instructions show uploading of sales and thank you pages, but the squeeze pages follow the exact same format.
The HTML Sales and Squeeze Page editing and customization instructions are included with each pack inside the sales and squeeze materials folders, it is important that you not use these elements as they are, because they require certain edits to make them your own, for example adding your payment gateway to the buy links, most important, 😉
STEPS TO UPLOAD SALES MATERIALS TO YOUR SERVER
Step 1:
Log into the cPanel of your hosting account (you can also use an FTP software to upload the files if you are familiar with it, FileZilla is free). Some hosts limit file sizes that can be uploaded through cPanel, so you may have to use an FTP software.
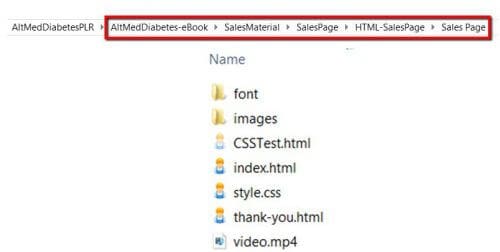
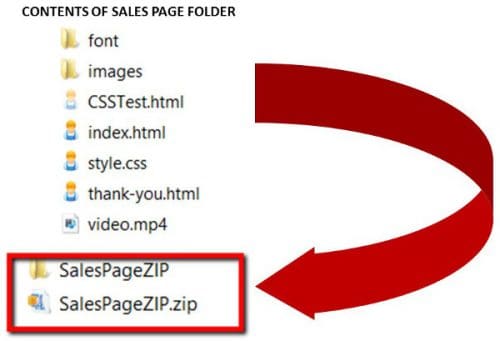
Here is an image of the files you will be working with as provided in the PLR pack. I will be using the Alternative Medicine For Diabetes Pack’s eBook sales material as an example.
Step 2:
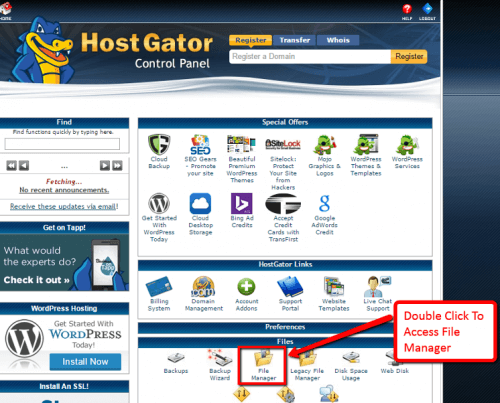
At this point you should be logged into your cPanel. Locate and double click the File Manager to access the Public HTML directory.
This tutorial uses Hostgator hosting, but cPanel is universal and looks the same in ALL hosting services.
Step 3:
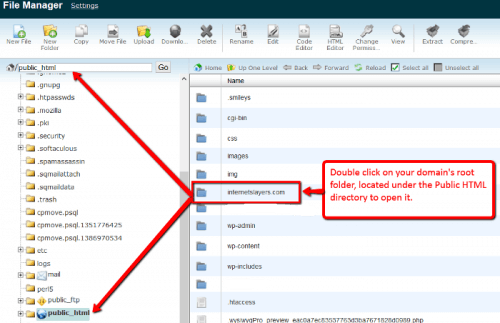
Locate the root folder of the domain where you want to place the sales and thank you pages. This will be located in the Public HTML directory of your cPanel. Double click that folder to open it.
Step 4:
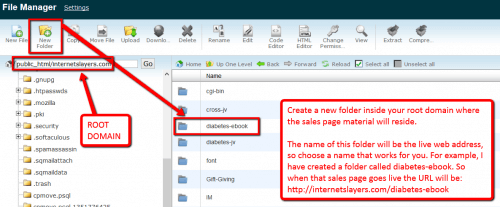
Once inside the root folder, create a new folder (as shown on image) where you will upload the HTML sales page and accompanying elements.
Step 5:
Zip all the files in the Sales Materials folder provided in the PLR pack, as shown in Step 1, and in this image:
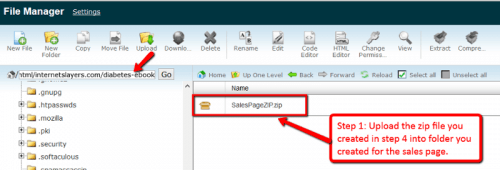
Step 6:
Upload the Zip file to the folder created in Step 4.
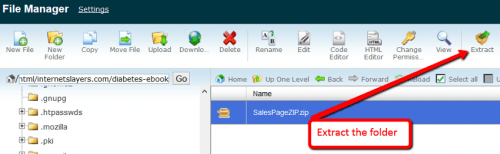
Step 7:
Extract the contents of the zip file as shown in the image
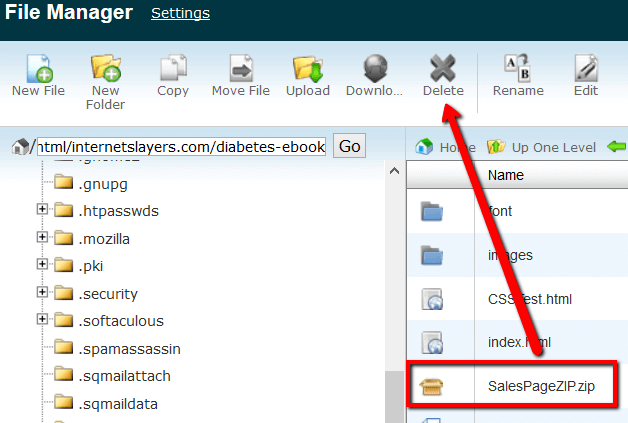
Step 8:
You can now delete the .ZIP folder from your server.
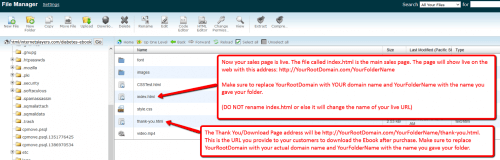
Step 9:
That’s It! Now your sales and thank you/download pages are live! Please note that this is how the files need to be inside your created folder, if anything is changed (ie: moving files to other folders, or changing file names) they will not render properly on the live pages.
See image for web address instructions. Make sure to change the URL address with your data, ie: domain name and folder name.
Leave a Reply